Getting started
Getting started
Some steps you can follow to get a feel of of the plugin's features.
Video tutorial
A quick run through of the major features available in the GF Eclipse Plugin. If the video doesn't appear above, you can view it at https://vimeo.com/38768382
The Eclipse workspace and project concepts
When you run Eclipse, it asks you to create or specify a workspace on your system, which is essentially the top directory that Eclipse will "see". Any code you wish to work on inside Eclipse must reside in this workspace. A workspace contains one or more projects, which may or may not be related to each other. Generally each folder under the top-level workspace directory is considered an individual project, i.e.:
workspace/
    Project1/
        file1-1.gf
        file1-2.gf
    Project2/
        subdir2-1/
            file2-1-1.gf
            file2-1-2.gf
        file2-1.gf
        file2-2.gf
If you open an existing folder as your workspace in Eclipse, then your folders in that workspace do not automatically become Eclipse projects.
To do this, you must follow the "Create new GF Project" wizard below, and give your project the exact name of the existing folder (e.g. Project1 or Project2 in the example above.)
GF Nature
The GF Nature is what makes a regular Eclipse project a GF project. If you create a new GF Project from scratch then you don't need to worry too much about them. If you already have some project set up in your Eclipse workspace, then you will need to associate the builder with your project in order for all the GF goodness to work. This will internally add the GF Builder to your project also.
As of 1.4.2, this can be done very easily by right-clicking on your project in the explorer and clicking Add/Remove GF Nature. If your project has the GF icon overlayed on it, then the GF nature and builder are correctly associated with it.
See the project settings section above if you want to mess with your .project file.
Metadata folders
GFEP will create the following metadata directories within your project:
- A
.gfbuilddirectory in every folder containing GF source code, containing.gf-tagsfiles created using the GF--tagscompiler flag.
These can be removed manually at any time, as they will always be regenerated as necessary. You will probably want to ignore these directories in your version control system.
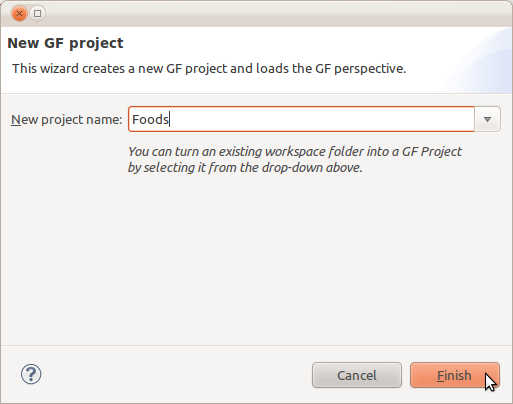
Create a new GF Project
If you have a folder in your workspace which you want to convert into a GF Project, then you can select it from the drop-down. This folder will then appear as an Eclipse project in your workspace.
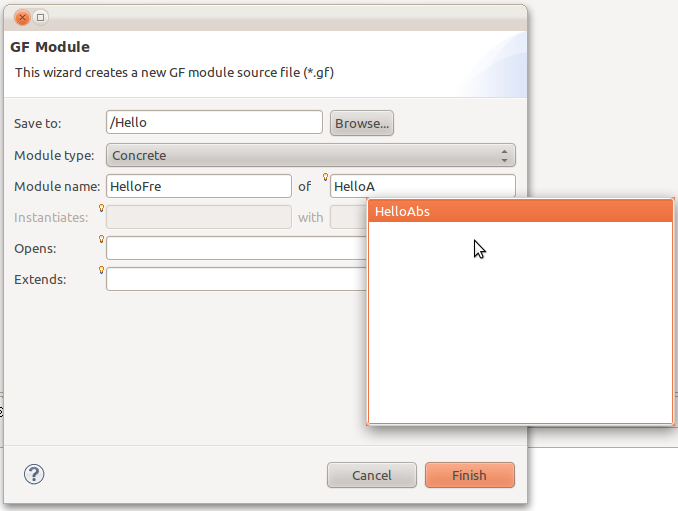
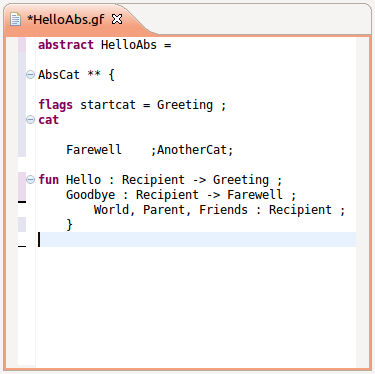
New module wizard
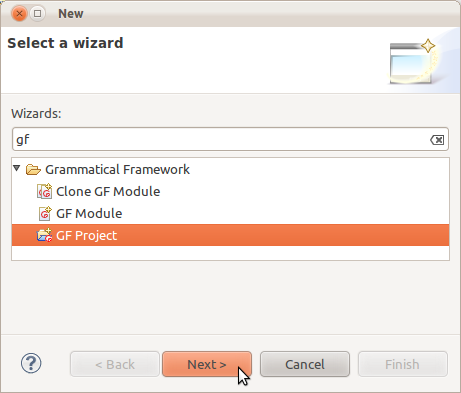
Use the GF Module wizard from File → New → Other → GF Module:
You can find some small examples here. Download the files and manually add them to your Eclipse workspace to experiment with some of the plugin features.
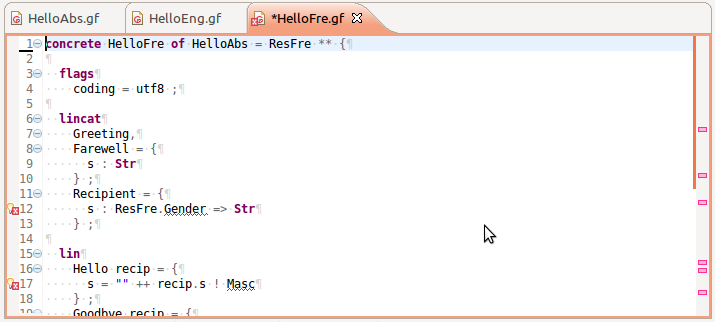
Clone module wizard
If you want to clone an existing module into a new language, you can now do so via the Clone GF Module wizard. This is also available as a context menu option in the Project Explorer, via <Right click> → Grammatical Framework → Compile for new language:
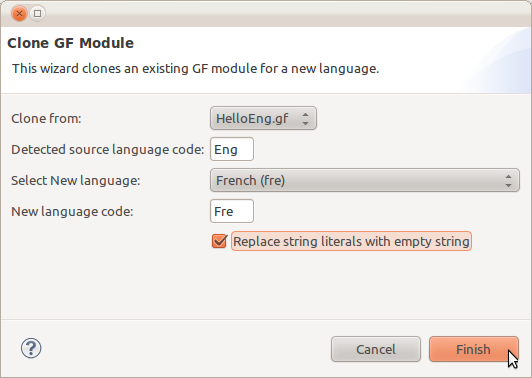
This will create and open a new module with the relevant replacements made. Note how in this case string constants are replaced by the empty string "". This wizard currently only works on concrete and instance modules.
Workbench editor layout
Use Eclipse' own features to drag and drop your editor tabs to suit your needs.
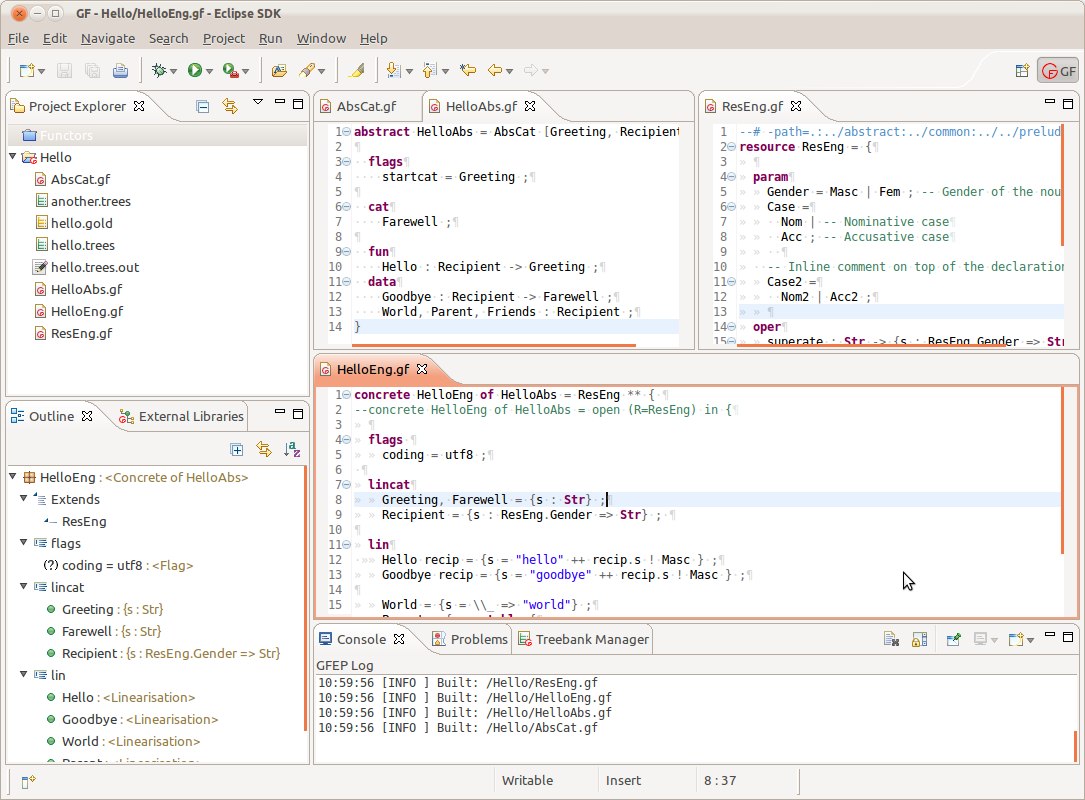
Outline view
The Outline view in the bottom-left offers a quite overview of your module structure. Clicking any of the terms will make your cursor jump to that point in the file.
Cross-referencing errors and warnings
Notice how changing a cat definition for example will produce warnings and/or errors in other the modules.
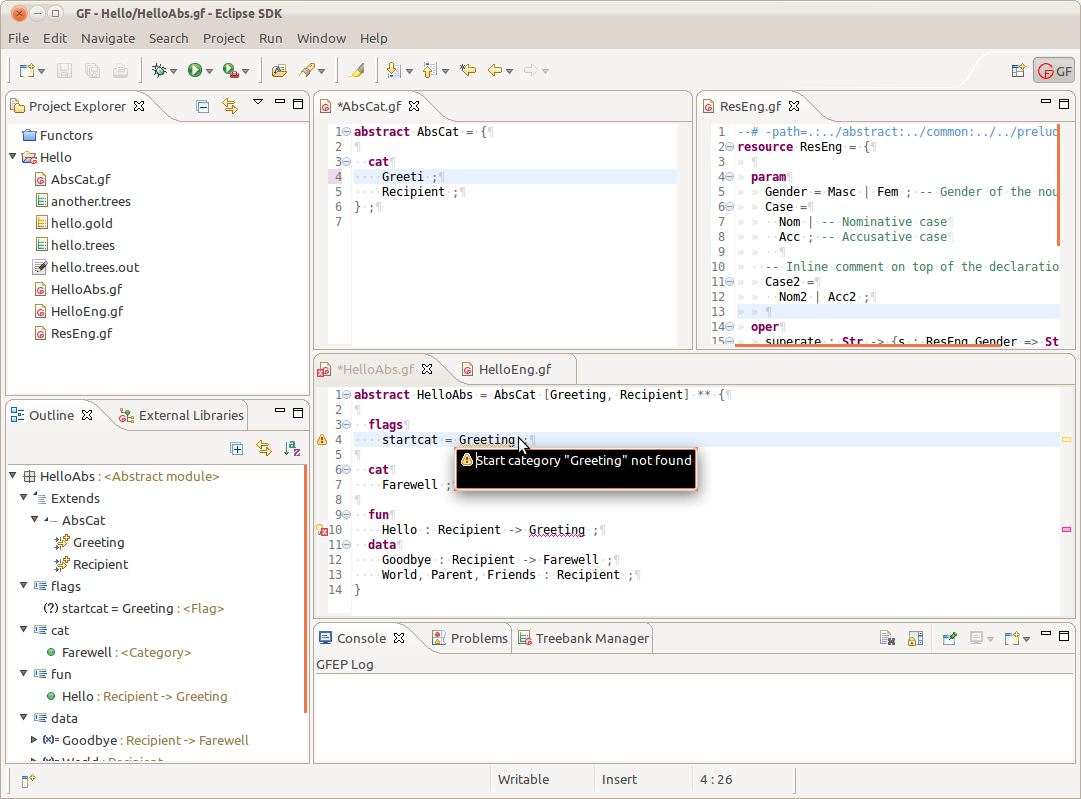
Validation
The in-editor validation sometimes needs to be triggered/updated by a keystroke. If you can still see errors which you believe should be correct, try adding a space character to ensure the validation is re-triggered.
Sometimes you may get an entire file marked with errors, even though in fact there is only a single error which is causing the internal builder to fail. In such cases referring to the Problems view should help you locate the cause. This issue is particularly relevant when changes made to one module may induce errors in its descendants (e.g. renaming a parameter in a resource module). This behaviour will hopefully be improved in future versions.
Builder
For validation to work correctly, the project's Build Automatically option should be turned on. Each time you save a file (or some other change occurs in your project), the builder should get triggered which re-compiles any GF files which have changed. If the builder does not seem to get triggered, try to run a clean via Project → Clean...
Code formatting
Use the built-in code formatter to tidy your code automatically. Right-click in the editor and choose Format or use the keyboard shortcut Ctrl+Shift+F.

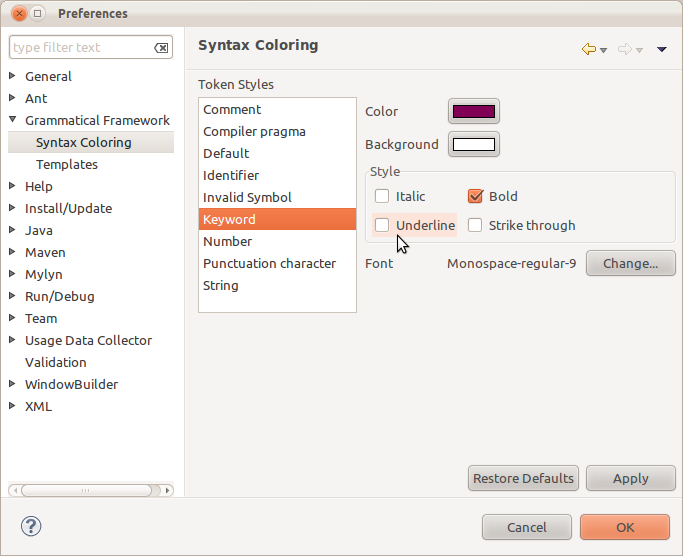
Syntax highlighting
You can change your syntax colouring styles as you wish from Preferences → Grammatical Framework → Syntax Coloring
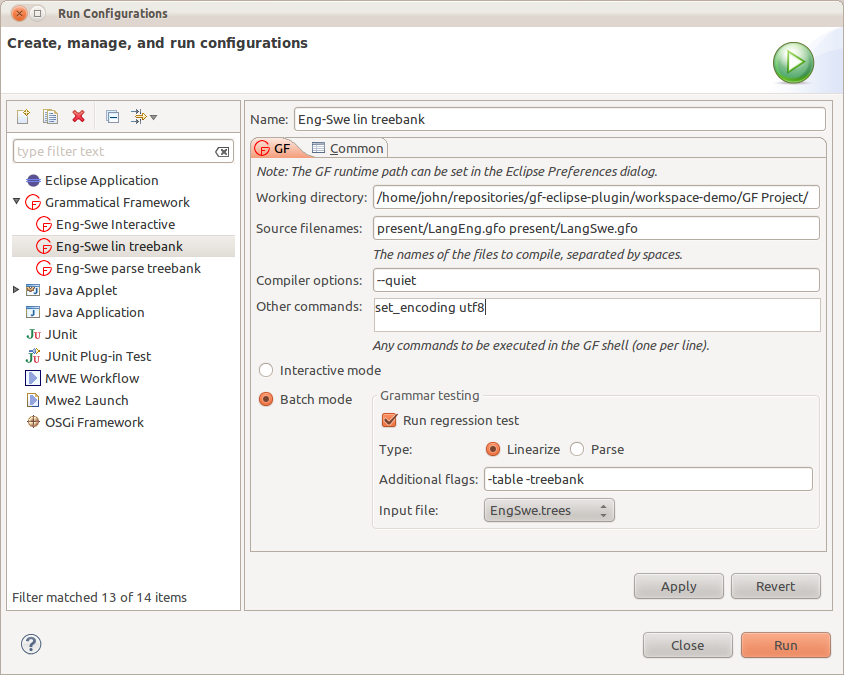
Launch configurations
Set up a launch configuration from Run → Run Configurations... → Grammatical Framework. You will see the dialog below with some fields automatically filled in for you.
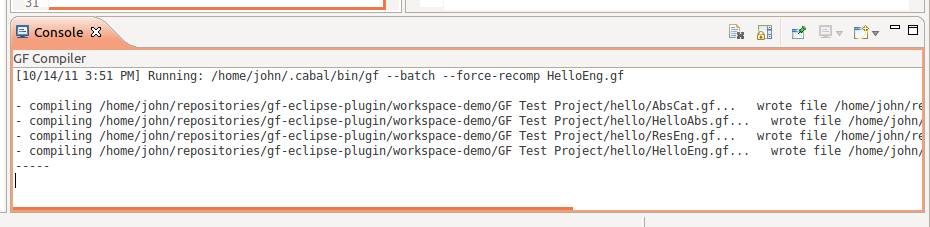
Run the launch config and you will see the output from the GF compiler in the console view within Eclipse.
Run As... launch shortcut
Using the Run → Run As → Compile with GF shortcut will take the current selection or active editor and do one of two things:
- If a launch configuration already exists which the current file in its Source filenames field, then that config will be launch directly.
- Otherwise, a new a launch configuration window is displayed where you will need to review and confirm the default settings before continuing.
Consoles
The plugin provides its own console view named GFEP Log, which shows log messages based on the Log Level preference (Preferences → Grammatical Framework).
Additionally, every time a grammar is Run a new console is opened to display the output. This console may also serve as the interactive GF Shell, depending on the Interactive Mode checkbox in your Run Configuration.
Eclipse does not make it obvious when multiple console windows open; click on the Display Selected Console button to switch between open consoles:
![]()
If the process associated with a console window has terminated, it will be indicated in the upper-left corner as below. Such console windows can then be closed using the grey cross button:
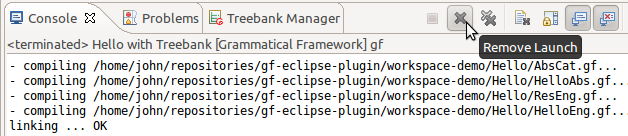
The Eclipse console implementation does not support command history (up arrow) or auto-completion (tab).
External Libraries view
This view is automatically populated with a list of all the external modules referenced by the current file. Double-clicking on any item provides a quick way of opening GF files which are imported into your grammar from outside your Eclipse project, for example the GF Resource Grammar Library.
This view also provides a text box for searching within the current module's scope, as shown in the image below. Clicking the small arrow on the right-hand side of the view provides options for case sensitive and/or regular-expression based search.

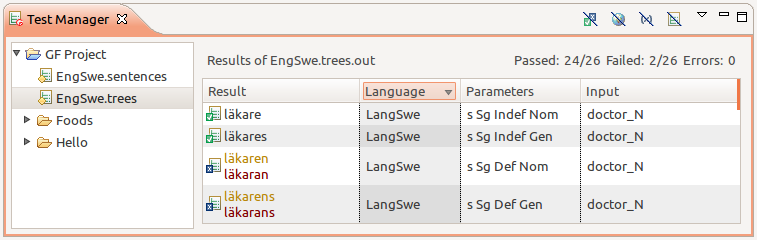
Test Manager view
This feature works together with the launch configurations to make the process of running regression tests on your grammars quick and easy. As described in the GF Book (Section 10.5), the general development-test cycle (independent of GFEP) is as follows:
- Create a file
test.treeswhich contains a bunch of abstract syntax trees, which you want to test - Compile your grammar and linearise the trees one by one, using some command like
rf -lines -tree -file=test.trees | l -table | wf -file=test.trees.out - Manually correct the output in
test.trees.outand save it as your gold standard filetest.trees.gold. - Each time you update your grammar, repeat step 2, then compare your new output against the gold standard using
diffor some other comparison tool.
The Test Manager view follows this same pattern but provides a convenient graphical interface for running your test cases and also for looking at the output, just using a few clicks:
Note that GFEP assumes the following convention:
*.treesor*.sentences- Test input files: trees file (for testing linearisation) and sentences file (for testing parsing)
*.trees.outor*.sentences.out- Corresponding output files (generated each time a test is run)
*.trees.goldor*.sentences.gold- Corresponding gold standard files (manually corrected from an output file)
Logs
The GFEP writes to the Eclipse platform log. This can be accessed in two ways:
- By opening the Error Log view in Eclipse
- Accessing the file directly at
<workspace>/.metadata/.log
You can set the log verbosity from Preferences → Grammatical Framework.
Common issues and fixes
No identifiers are resolved and my log contains messages saying "File Syntax.gf does not exist."
In general, this means that something is wrong with your library path setting.
GFEP attempts to compile all of your files individually with GF, which is not the usual way in which you would compile your grammar.
As a result, when looking for the RGL files, GF needs a little help via the path argument.
The normal way to do this is to specify the Library path setting from Preferences → Grammatical Framework, setting it to something like .:alltenses:prelude (this is the default setting). Note that these paths are relative to the true RGL directory, which GF should already be aware of. The value of this setting is passed to GF from GFEP using the --path flag.
The Library path setting is the same for all your GF projects. If you want finer-grain control over the path compiler option then you should use compiler pragmas in your source files, e.g.:
--# -path=.:alltenses:prelude
The advantage of this method is that the information is bound to the file, so you can freely compile your modules outside of GFEP without having to specify the path as a command line option to GF. The disadvantage is that you need to specify such a pragma in every single file (at least if you want to continue to use the GFEP).
Other strange behaviour
When things seem strange, the very first step is always to clean the project via Project → Clean.... I only support the latest version of the plugin, so make sure you are up to date too.
If problems persist, please contact me or better yet file an issue on the GitHub issue tracker (see below).
For developers
Project setup
In order to build/run the GFEP from source, you need to have the Xtext libraries available in your Eclipse workspace. You have two choices:
- Download the Xtext libraries from http://www.eclipse.org/Xtext/download/ and add them to your existing Eclipse instance
- Download a release of Eclipse packaged together with Xtext from http://xtext.itemis.com/xtext/language=en/36553/downloads
In both cases make sure you get the correct version of Xtext (see below).
Once you have Xtext set up, you can clone the repository locally with git clone git://github.com/GrammaticalFramework/gf-eclipse-plugin.git and then add the projects under the workspace directory to your Eclipse workspace.
Xtext version
GFEP currently uses Xtext 2.1.0.
Running from source
Once you have set up your projects (see above), you can run/debug the GFEP by following the steps here. Note that this means you will be running two instances of Eclipse simultaneously; the first debugging the second.
Building plugin package
To package the GFEP sources as .jar files and install/update the GFEP in a separate Eclipse installation, do the following:
- Right-click on the project
org.grammaticalframework.featureand choose Export... - Select Plug-in Development → Deployable features
- Use the following options:
- Available features: org.grammaticalframework.feature (x.y.z.qualifier)
- Destination
- Directory: <local directory>
- Options
- Package as individual JAR archives
- Generate metadata repository
- Categorize repository: <workspace>/org.grammaticalframework.feature/category.xml
- Allow for binary cycles in target platform
- Package as individual JAR archives
- Click Finish and wait for the plugin to build. You may get some errors, in which case look through the generated
log.zipand fix them, then repeat the process.
Other notes
Some have mentioned than when opening the GFEP sources, under Linux, they needed to install the following:
sudo apt-get install appmenu-gtk
sudo apt-get install gtk2-engines-pixbuf